Recording a trip
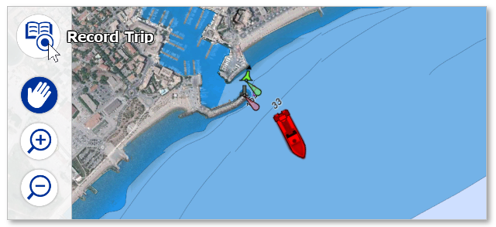
To start recording a Trip, Click on the "Trip" button from the Toolbar.
Note: If the "Record Trip" tool is not displayed by default in the toolbar and you wish to use this tool to record your trip, you must add it to the toolbar configuration. Click on the configuration button (at the bottom of the toolbar) and add the "Record Trip" tool.
As soon as the Trip recording is started:
-
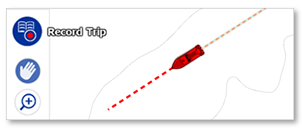
The Trip button is highlighted in blue indicating that recording is in progress.
-
The Boat is automatically center on the chart
-
The Trip Bar will appear automatically at the bottom of the screen. The Trip bar shows the Trip distance, Trip duration, Speed (Speed Over Ground),...

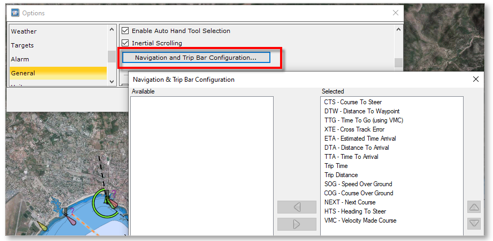
Note that it is possible to customize the data being displayed inside the Trip Bar from the General settings by clicking on the "Navigation and Trip Bar configuration" button.
To save or pause the Trip recording, click the Trip tool again.
A "Save Trip" panel will automatically appear on the left and the recording will be paused. You can restart the recording by clicking the "Resume" button or stop it by clicking the "Save Trip" button after you have entered the information for this trip:
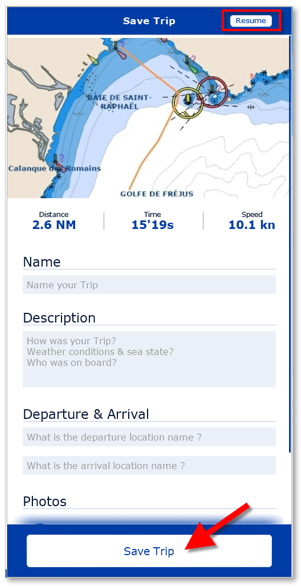
TIPS: If you do not enter all the information after finishing the Trip, TimeZero will automatically fill some names based on the location. You will always be able to update any of the fields later by editing the Trip.