Tools
Some tools may only be available in specific WorkSpaces or when specific Modules are unlocked:
-

 "Track": Click on this button to enable or disable Track Recording. Track recording is enabled when this button is surrounded in blue.
 -

 "Record Trip": click on this button to enable or disable Trip recording. Trip recording is enabled when this button is surrounded in blue.
 -
 "Zoom In/Out": Click on these buttons to zoom in or zoom on the chart. You can adjust the scale selection from the Plotter Display Options (by clicking on the button "Chart Scales Selection")
 -
 "Zoom": This tool is very useful if you don't have a scroll wheel to zoom continuously on the chart. When this tool is selected, left click to zoom in and right click to zoom out.
 -
 "Pan": This is the tool which is selected by default. It allows you to pan the chart with the mouse. If you have another tool selected, pressing the ESC key on your keyboard revert to the Pan tool.
 -
 "Divider": This tool allows you to make bearing and range measurement in between two points. If you select this tool and double click on the chart, it will create a divider line in between own ship position and the point where you double clicked. You can double click on the tool itself to erase all dividers.
 -
 "Go To": This tool allows to create a quick "Go To" point by creating an Active Route. You can double click on this tool to create a Go To using lat/lon.
 -
 "Mark": This tool allows to create marks. You can double click on this tool to create a mark using lat/lon.
 -
 "Route": This tool allows to create route.
 -
 "3D Orientation": This tool is used to adjust the 3D view when the chart mode is set to "3D" . You can switch from 2D to 3D by clicking on the "3D" button located inside the chart scale at the bottom left of your screen.
 -
 "Boundary Area": This tool is used to create areas. Select this tool, click on the chart to create boundary points and double click to close the area. You can double click on this tool to create an area by using lat/lon.
 -
 "Boundary Circle": This tool is used to create circles.
 -
 "Boundary Line": This tool is used to create lines. Click on the chart to create boundary points and double click to end the line. You can double click on this tool to create a line by using lat/lon.
 -
 "Annotation": This tool is used to create annotation. You can double click on this tool to create an annotation by using lat/lon.
 -
 "Recall Track": This tool (available in the Planning WorkSpace) is used to recall a Track portion from a Trail.
 -
 "Event": This tool is used to drop a mark under the boat position.
 -
 "MOB": This tool is used to drop a "Man Over Board" (MOB) mark under the boat position. When you activate the MOB, it drops a marks, selects the "Navigation" WorkSpace and zooms at a navigation scale automatically. If you would like for the MOB to also create an Active Route (to the MOB location) and raise an alarm, you can change the "MOB Behavior" from the Alarms Options.
 -
 "Synchronize Radar Range" (requires the Radar Module): Press this button to adjust the radar range to the closest matching chart scale. On the Navigation WorkSpace, you can also click on the Radar Scale (on the bottom right of the screen).
 -
 "Range In/Out" (requires the Radar Module): These buttons are used to increase or decrease the radar range.
 -
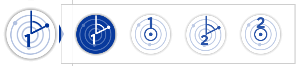 "EBL VRM 1/2" (requires the Radar Module): Right click on this tool to select either "EBL" or "VRM" mode (two set each). Click on the chart or radar screen and drag the cursor to create the EBL or VRM. Double click on this tool to erase all EBL and VRM.
 -
 "Guard Zone 1/2" (requires the Radar Module): Click on this tool to create a Guard Zone (relative to the boat) by clicking and dragging the cursor on the chart or radar screen. Once the guard zone has been created, right click to adjust its parameters. You can create up to two guard zones by right clicking on the tool. Double click on this tool to erase all guard zones.
 -
 "Range In/Out" (requires the "Sounder Module"): These buttons are used to increase or decrease the sounder range. You can adjust the scale selection from the Options (by clicking on the button "Sounder Range Selections")
 -
 "Update Area": This tool is only available in the "Update" WorkSpace and is used to define the weather update area. Once the area is defined, select "Download".
 -
 "Launch Routing": This tool requires the "Routing" Module. It is used to create routing in between two points. If you double click on the chart and have a valid GPS position, it will create a routing in between own ship position and the point.
 -
 "Screenshot": This tool takes a screenshot of the screen and stores it in the location define under the General Options ("Screenshot Recording Location").