Target Trail
Target Trail
TimeZero automatically keeps track of all the AIS and ARPA target history (for up to 12H). In order to display the target position history (called a "trail"), simply click on a target to select it, and its trail will be automatically displayed:
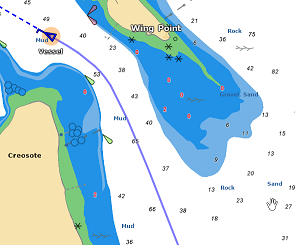
Note: The trail color always matches the target color.
The trail offers a very convenient and quick way of displaying the target overall movements without having to manually enable track recording and without cluttering the display with hundreds of tracks. You can adjust the trail length from the Targets Options or from the Target button located in the ribbons with the "Target Trail Length" setting (set to 6 minutes by default).
Note that it is possible to display the trails on all targets by selecting the corresponding option from the Target Ribbon button. It is also possible to automatically display the trail on "dangerous" targets (targets that break the CPA alarm or that are manually classified as Hostile).
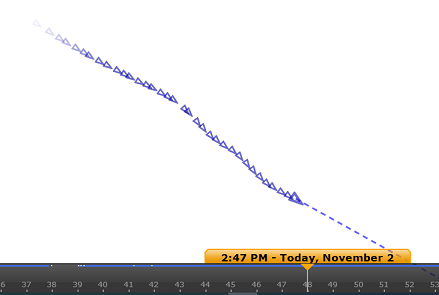
If you have the Record & Replay Module, you can display a trail on a replay target (thus extending the 12H limitation) by simply clicking on a replay target. Note that the trail representation on a replay target is slightly different:
Target Track
If you prefer to record permanently a track, Target Tracking can be enabled on AIS and ARPA targets by right clicking on a target and selecting "Target Tracking". From that moment, TimeZero will stop displaying the trail and start recording a track. Just like trail, the track line has the same color as the target (this can be changed by right clicking on the target or the track at a later time).
When the target disappears from the screen (when the target is lost), the track remains on the screen until manually deleted by the user (by right clicking on the Track line). In case of AIS target, tracking can be automatically enabled as soon as the target re-appears if "Remember AIS tracking status" is set checked from the Targets Options.
Tracking can be automatically enabled or disabled by Rules. However, setting an automated rule that enables target tracking may create a huge number of tracks after a while. To limit the number of tracks being created, it is recommended that for each rule that enables target tracking, another rule should be created to disable tracking (for example, enable tracking when target enters an area, and disable when target exit the same area).
Target Track Recall
It is possible to create a target track after the fact from a target trail. This is useful if you do not want to enable Target Tracking systematically (to avoid creating lots of tracks), but decide at a later time to create a track from a trail. Simply right click on the target trail and select "Recall Track". All the trail points will be displayed and the cursor will change allowing you to set a starting position by clicking a first time, and then set an ending location by clicking a second time:
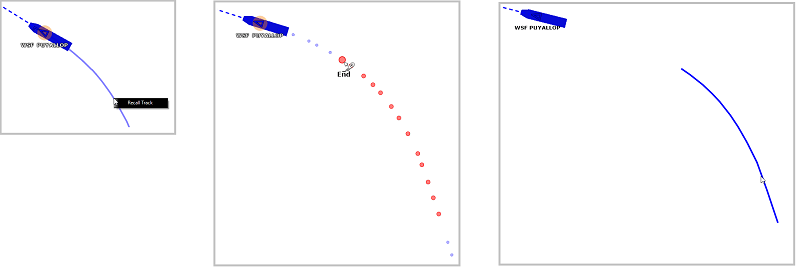
After setting the end point, the track will be recalled and saved permanently in the track database (until manually deleted).
Note: The track might be displayed initially behind the trail. You can right click anywhere and choose "unselect all" to de-select the target and hide the trail from the screen. This should reveal the track behind it.