Filters
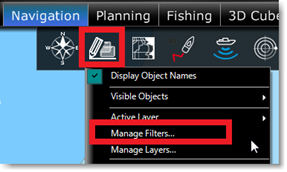
TimeZero allows the user to create filters based on simple parameters (type of object, color, icon…) so that only the relevant information is displayed on the screen. Filters can be created by selecting “Manage Filters…” under the “User Objects” button:
Creating Filters
To create a new filter, click on the "Add" button. After giving a name to the filter, you can add parameters that will define the objects you will see when the filter is applied:
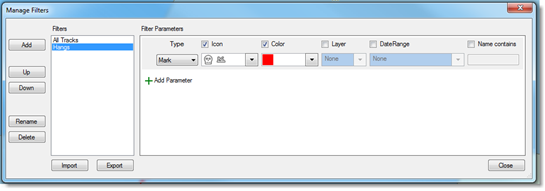
Up to 20 filters with multiple parameters can be created. Filters criteria include:
-
Type of Object (Marks, Annotations, Route, Areas, Circle, Lines, Own Ship Tracks, AIS tracks, ARPA tracks, Catches and Photos)
-
Icon (for marks) and pattern (for boundaries)
-
Fish Size and Weight (for Catches)
-
Color
-
Layer
-
Creation Date
-
Name of Object
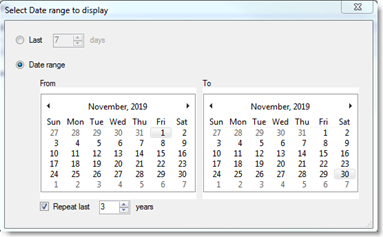
Note that the date criteria is very flexible and allows to select objects that have been created/modified during the last XX days (last week for example), or created/modified in between two specific dates, or created/modified in between two specific dates over multiple years (to select multiple fishing seasons):
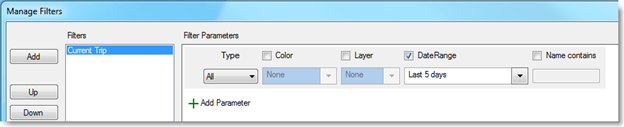
A filter can be configured to be as simple as displaying all objects that have been created/modified during the last 5 days (for example to only show the objects that have been created during the current fishing trip):
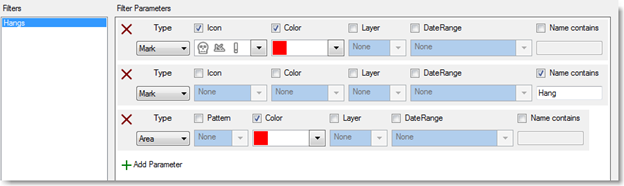
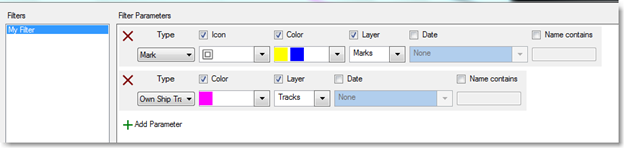
But filters can be configured to be very advanced by combining multiple parameters and multiple types of objects. For example, the filter below will display marks that are red with specifics icons (3 icons), plus any marks whose name contain “Hang”, plus any areas that are red:
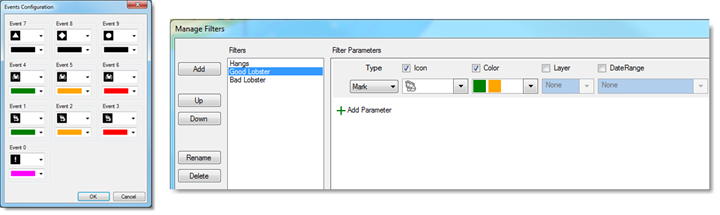
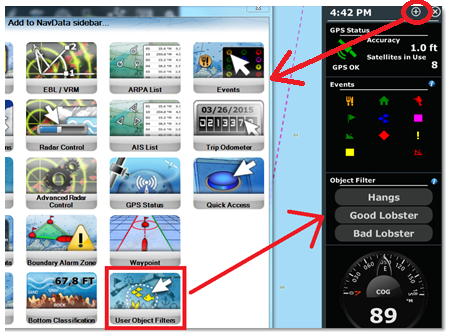
Filters are especially useful when paired with the use of Events, especially the Event NavData that allows to quickly drop preset marks under the boat. In the example below, the event NavData has been configured with lobster and crab icons that use a color code to indicate the relative catch amount (green for a trap that is full, orange for an average trap and red for nearly empty). Then, corresponding filters have been configured allowing the user to highlight productive areas with one click:
Note that filters can be created directly from existing user object selection. For example, you can OPTION-Click (or Shift Drag) on multiple objects and then create a new filter with the option “Initialize filter with selected objects”:
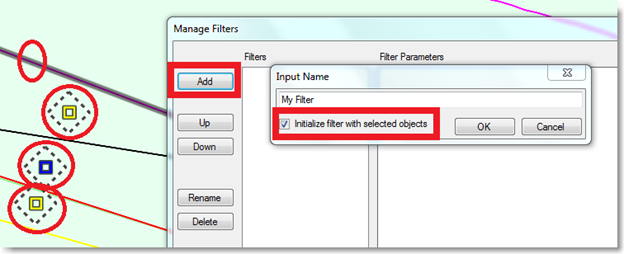
This will automatically create a filter with the selected objects in parameters:
Applying a Filter
Filters can be selected from the "User Objects" button under "Visible Objects":

Note: It is not possible to select multiple filters at the same time. Only one filter can be selected at a time.
But a more convenient way to select your filters is to use the dedicated Filter NavData. To add a new NavData, click on the "+" located at the top of the NavData container (it must be opened first). Then, find the "User Object Filters" in the list and click OK to add it to your configuration:
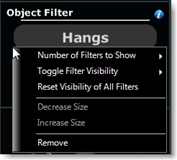
By default, this NavData will display the first 4 filters, but right clicking on the NavData allows to limit the number of filters to 2 or expand it to 8 filters. The active filter selection (if any) will be displayed in yellow/orange in the list:

Note that you can re-order the list from the “Manage Filter” window (by clicking on the blue “i" icon), but you can also hide specific filters by right clicking on the NavData (and use “Toggle Filter Visibility”):
TIPS: Independent filters can be selected on each display and each WorkSpace. For example, if you split your screen in two (two plotters), the left side can be configured with one specific filter independent of the right screen.
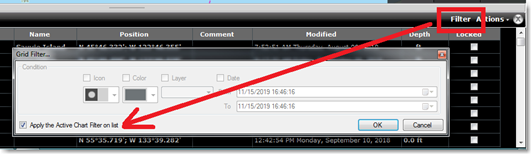
Using Filter in Lists
The lists (Marks List, Tracks List, Boundaries Lists) can be setup to use the active filter (so that the chart and the list are synchronized and display the same objects):