Fishing WorkSpace
The "PBG Module" needs to be unlocked to access this feature
Fishing WorkSpace controls
The Fishing WorkSpace is similar to the Navigation WorkSpace, but includes additional controls on the right side of the screen that allow the user to quickly adjust Depth (and Hardness) Shading, Terrain Shading and Contour lines parameters:
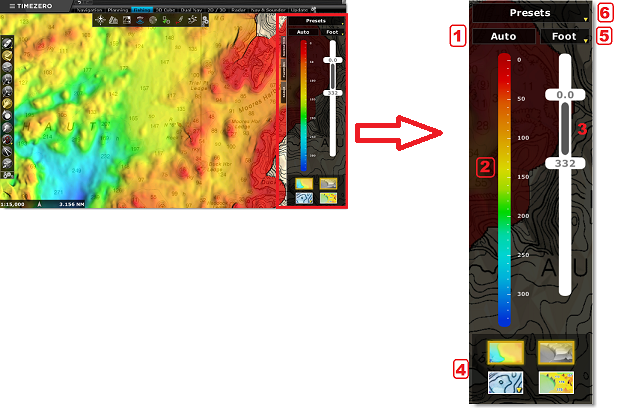
1: Depth Shading Mode
This button located at the top of the color scale allows you to switch in between 3 modes of Depth (or Hardness) Shading:
-
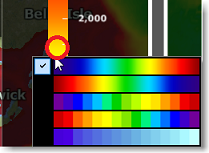
Auto: In this mode, the color palette is fixed (color gradient) and the minimum and maximum scale is adjusted automatically according to the area (using the shallowest and the deepest point currently displayed on screen). In this mode, the Min/Max sliders control (3) cannot be adjusted as the minimum and maximum are adjusted by the software. Although you cannot change the scale values, you can change the color palette used by right clicking on it:
-
Manual: In this mode, the color palette is fixed (color gradient), however the user can adjust manually the minimum and maximum scale using Min/Max sliders control (3). It is possible to click and drag on the slider handles, but also double click to enter a value manually using the Keyboard. If you use the wheel while the cursor is over a slider handle, it will automatically "snap" to the nearest rounded depth value.
Tips: The color palette is fixed using a color gradient in Auto and Manual mode, it is possible to change the overall color by right clicking on the color gradient (2).
-
Discrete: In this mode, you can adjust the minimum and maximum scale value (to set your working depth area), and then adjust precisely which color you want to use for specific depth range. You can add a color by double clicking on the color scale (2) or right click and select "Add Color". The color can be moved along the scale by clicking and dragging or by double clicking and entering a value. Color can be changed or removed by double clicking or right clicking on a color and select "Edit".
Tips: In Manual and Discret Mode, a button appears just underneath the scale slider (3). This button allows to automatically adjust the Minimum and Maximum scale just once (just when pressed). This is specifically useful to initially set the overall range of depth in Discrete Mode: 
2: Color Scale
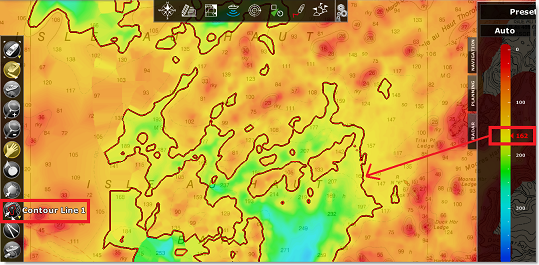
The color scale allows you to give a reference in between the colors displayed on the chart and corresponding depth. In Discrete mode, it is possible to specify the color and move them along the sliders. The color scale also displays the depth location of the contour lines drawn with the contour line tool. You can also drag it or double click on it to adjust its value:
Note that you can change the default scale color palette (when the mode is set to "Auto" or "Manual") by right clicking on it:
3: Range Scale
The range scale defines the minimum and maximum value where color will be shown. In Discrete Mode, it is important to adjust this slider fist before adjusting the individual color. If "Restrict Contour Lines to Depth Shading Range" is selected in the Contour Line options, this slider will also affect where contour lines are drawn on the chart.
4: Display Buttons
These buttons located at the bottom allow to turn ON or OFF specific overlays on the chart:

This button turns ON and OFF the Depth or Hardness Shading display. If you have hardness or backscatter data recorded in your database, you can right click on this button to switch the color shading according to hardness or backscatter (instead of depth).

This button turns ON and OFF the Terrain Shading display. Terrain shading allows to better see the relief even in 2D.

This button turns ON and OFF the Contour Lines display. Right Click on this button to quickly access the Contour Lines parameters.

This button turns ON and OFF the PBG Depth Soundings display. These depth soundings are displayed in black and comes from the user or imported 3D PBG database (in contrast to light blue soundings that are coming from the vector charts)
5: Unit Selection
This button located just above the range scale allows you to quickly change the depth unit of the software.
6: Preset Selection
At the very top, the "Presets" button allows you to manage or switch in between presets. A Preset captures all settings included in the panel: depth shading mode (Auto or Manual or Discrete), range scale minimum and maximum values, color scale, button states and contour lines parameters. You can create up to 12 presets.
Presets are very useful especially when using the Discrete Depth Shading. They allow you to record various color palette settings for various application and allow to swap very easily from one to another.
Tips: Even if the button allowing you to switch preset is not available in the other WorkSpace (Navigation, Planning,...), it is possible to set a shortcut or add a Quick Access NavData to switch preset from anywhere in the software.
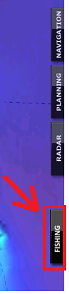
Opening and Closing the Fishing WorkSpace Controls
At the top of the screen, a Close button allows you to collapse the dedicated Fishing WorkSpace controls, providing more space for the chart display:
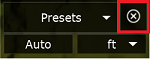
When the Fishing WorkSpace controls are closed, a Fishing tab appears, allowing you to reopen the controls at any time:
Note: When the NavData panel is opened, the Fishing WorkSpace controls automatically collapse to make room for the NavData display. The same Fishing tab can be used to reopen the Fishing WorkSpace controls, which will automatically close the NavData panel. It is not possible to display the NavData panel and the Fishing WorkSpace controls at the same time.
Fishing WorkSpace Bathymetric View
Bathymetry (3D below water) is turned OFF by default, but it can be enabled in the Fishing WorkSpace. This means that, by default, the seafloor appears flat. This is to avoid parallax effect that can be disturbing to some users. If you want to enable the 3D underwater in the Fishing WorkSpace, simply select "3D Bathymetry" from the "Mode" button in the Ribbons.
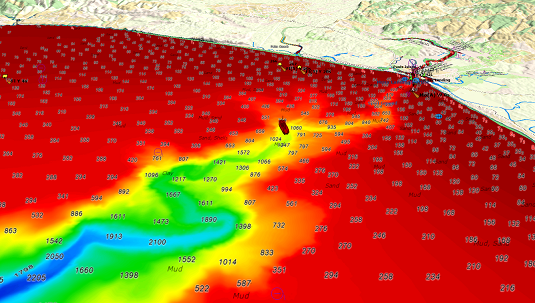
In the screenshot below, the Bathymetry is OFF (default setting). You can see that it is very easy to locate the boat relative to the chart:
In the screenshot below, the Bathymetry is ON. This allows you to visualize in great detail the underwater structure around your vessel. However, it might be difficult to place objects that appear at the surface (vessel icon, targets, marks, etc...) at their proper location relative to the bottom location:
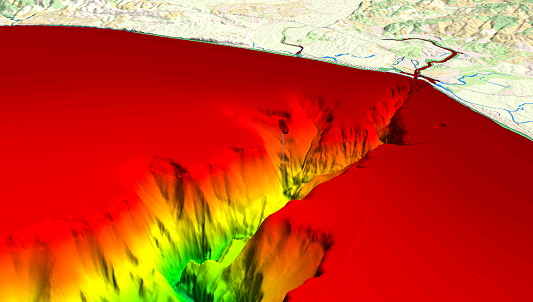
Also, when the bathymetry is enabled, vector charts objects are no longer displayed on screen (beside depth contour lines). For that reason, the Bathymetry is turned OFF by default in the Fishing WorkSpace.
When the 3D Bathymetry is turned ON, the 3D exaggeration under water is automatic, but an exaggeration factor can be applied in from the "Mode" ribbon button of the Fishing WorkSpace:

Note that it might be easier and better to view and analyze the bathymetry using the dedicated 3D Cube WorkSpace.