Trail & Tracks
TimeZero can keep track of your Own Ship position history using either Trail or Tracks. The trail is always and automatically recorded in the background (you have nothing to enable) and it can be either displayed or hidden on the chart. Tracks need to be manually recorded by using the track button (ON/OFF) or be recalled from a Trail portion. Tracks can then be managed from a list and exported/imported.
Trail and Track have each their advantages and their specific uses. Tracks are useful to permanently record specific passages or the location of fishing gear, but can quickly clutter your screen if you are not diligent about choosing when to enable or disable the track recording. The trail on the other hand is 100% automatic and you can dynamically adjust its length (using the trail duration setting).
For recreational boaters, the best practice is to primarily use the trail, and then, if you want to permanently display on your chart a specific passage, simply create a track from a trail portion (using the right click on the trail and selecting "recall track").
Note: Trail and Tracks are both recorded at one second interval as soon as TimeZero receives a good GPS position
Trail
To display the trail on your chart, select "Display Trail" under the "Own Ship" button:
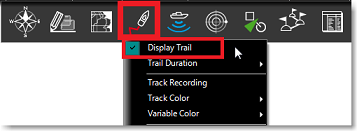
You can also right click on the boat icon and select Own SHip Trail.
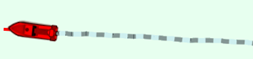
When enabled, the trail displays behind the boat icon all your contiguous position using animated white and black dots:
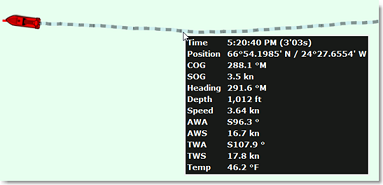
Hovering the cursor over any point of the trail will display a tooltip with all the data that was recorded at that time:
The trail duration can be adjusted from the Ship & Tracks Options or directly from the "Own Ship" button:
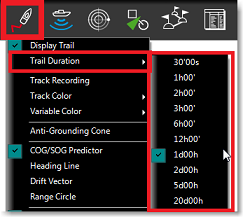
Note that the trail display is dynamic and changing its duration will immediately update its length on the chart. By default, TimeZero displays a trail duration of 1 day, but you can make it as short as 30 minutes or as long as 20 days.
Note: It is possible to replay a trail older than 20 days by using the Boat Replay feature of the Planning WorkSpace.
Tracks
Enabling / Disabling Track Recording
To enable or disable the track recording, click on the "Track" Button in the Toolbar:
When the track is being recorded, the "Track" Button turns yellow :

Click on the button again to toggle OFF the track recording.
Recalling a Track using the Trip List and the Trail
TimeZero has an innovative feature that allows you to recall any track portion from your trail (which is guaranteed to be always recorded). This is a much more practical way to create a track rather than trying to remember to press the track button ON and OFF at specific times. Although the live trail display is limited to 20 days, you can use the Planning WorkSpace and the trip list to recall any trail of any trips you have done in the past.
To recall a track:
-
Select the "Planning" WorkSpace
-
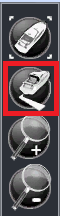
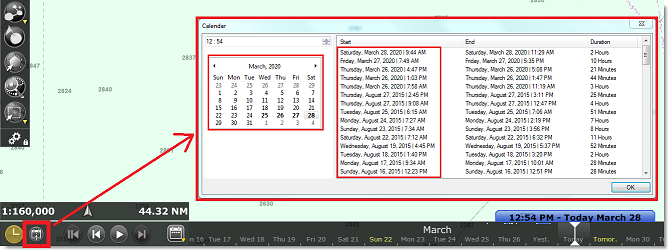
Click on the Calendar icon to open the Calendar and Trip list. Either select a date/time using the calendar or select a trip by clicking on its start date inside the list:
-
After selecting a valid date, the chart will center automatically to the recorded location and a blue boat icon will be visible on the chart (this is the position TimeZero recorded for the selected date/time). Note that you can move the timeline at the bottom of the screen to refine the date/time until the blue boat icon is approximately at the position you wish to record the track from.
-
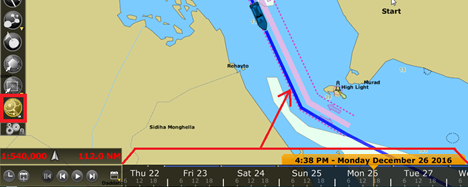
To activate the Track Recall mode, either click on the "Track Recall" tool available in the Toolbar of the Planning WorkSpace, or right click on the blue boat icon and select "Recall Track"
-
Once the Recall Track mode is enabled, TimeZero will display track points around the blue boat icon and your cursor will change into cut tool:
-
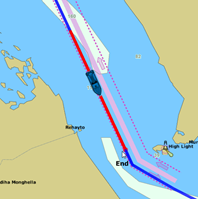
Use the tool to "cut" the track portion you want to recall by clicking on a first point to set the beginning of the track and by clicking a second time to set the end. TimeZero will then create a track automatically:
Track Coloring
You can change the default track colors from the Ship & Tracks Options by adjusting the "Track Color" setting. After adjusting this setting, all the new tracks will use that color by default. Note that you can individually change the color of any track by right clicking on a track and selecting a new color.
The Track can also be set to change its color automatically according to some parameters received in real time by your computer (Depth, Sea Surface Temperature, Speed and Bottom Discrimination)
Note: Bottom Discrimination requires the Furuno Sounder Module and a Furuno Ethernet Sounder BBDS1 or DFF1-UHD with selected transducers.
To set the track color according to a parameter, open the Ship & Tracks Options, select "Variable" for "Track Color", then select the parameter you want to use to change the color such as SST (Sea Surface Temperature) for "Variable Color". Finally, click on the button "Variable Color Setup" to open the color configuration:

Start by adjusting the minimum and maximum parameter values. Outside of these boundaries, the track color will be set to the first and last color (blue and red on the example above). Once the minimum and maximum values are adjusted click on the small color square to change the color and/or parameter value.
To add a new color, simply click on the "Add>>" button. To remove a color, click and drag the color square all the way to the right side (a trash icon will appear), then release the mouse. Press "Apply" to confirm the change, then "OK" to close the window.
From now on, each time you select the track to be "Variable Color", this color scale and parameter will be used.
Note: The track variable color does not affect the data being recorded. It only affects the display. If you want to change the variable color of a specific track, start by adjusting the color scale (and parameter used) from the Options, then right click on the track you want to change the color and select "Variable Color" then choose the parameter. This will refresh the track color using the latest settings
Recording Additional Data in the Track
By default, Speed (SOG) and Depth data are always recorded inside the track (provided that the corresponding sensor are connected and configured in TimeZero). You can add other data from the Ship & Tracks Options by clicking on the "Track Data Recorded" button. The following data can be recorded inside the track:
-
Course Over Ground (COG)
-
Heading
-
Speed Through Water
-
True Wind Direction
-
True Wind Angle
-
True Wind Speed
-
Apparent Wind Speed
-
Set (Current direction)
-
Drift (Current speed)
-
Atmospheric Pressure
-
Air Temperature
-
Sea Surface Temperature (SST)
To view the additional data recorded in the track, just rollover your cursor over a track. A Tooltip will appear:
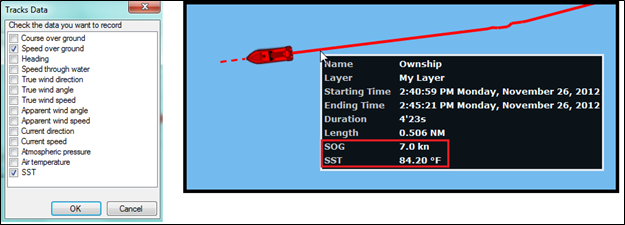
Note: You can only record a maximum of 10 additional pieces of data in the track. The depth and Bottom Discrimination (when connected to a BBDS1/DFF1-UHD) are always recorded and cannot be disabled.
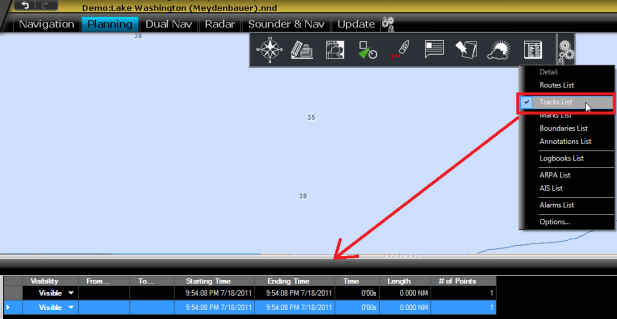
Displaying the Track List
To display a list of all the tracks, select the "Lists" button from the "Planning" WorkSpace Ribbon and click on "Track List":
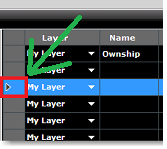
To select and center on a specific track on the Chart, click on the first column corresponding to the track you want to display:
Please refer to the Marks and Objects List chapter for more information on the List.
Converting a Track into a Route
Right Click on a track (either on the Chart or from the Track list) and select "Create Route". This will create a route that follows the track direction.
Note: If you right click on the track being recorded (the "active track"), select "Track Back" to convert the Track into a Route and automatically reverse it.
Importing and Exporting Track
Exporting Track
You can export all your tracks or only tracks belonging to specific layers from the "Import/Export" button available under the TimeZero button. Please refer to the Import & Export Data chapter for more information.
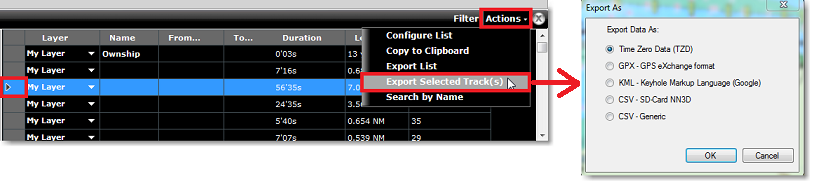
If you want to export only one track or a specific selection of tracks, you can use the "Action" menu of the Track List:
-
Open the "Track List" by using the "List" button located in the ribbon
-
Select one or multiple tracks. To select multiple consecutive tracks, select the first line, press and hold the SHIFT key then select the last line (this will select the range). To select individual tracks, press and hold the CTRL key and click on the lines.
-
Click on the "Action" button located on the upper right side of the list panel
-
Select "Export Selected track(s)"
-
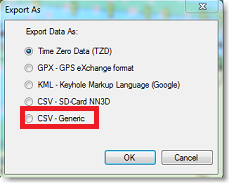
Select the export format
-
Give a name to the file that will hold your track(s) and save it:
Note: If you want to export one or multiple track to exchange them with another TimeZero user, it is recommended to use the "TimeZero Exchange (TZX)" format.
Exporting Track Details
When you select "CSV - Generic" from the format window, all the detailed track information (including additional data) will be exported as a CSV file:
This selection allows the user to generate a CSV file containing a new line for every track point with all parameters included in the track. The first line starts with # followed by the track name. The second line is a header indicating the name of each parameters contained in the column.
Example:
#Name1
Latitude,Longitude,Year,Month,Day,Hour,Minute,Second,Depth,Course over ground,Speed over ground,Heading,Speed through water,True wind direction,True wind angle,True wind speed,Apparent wind angle,Apparent wind speed,Set (Current direction),Drift (Current speed),Atmospheric pressure,Air temperature,SST
The resulting CSV file can be opened in Excel if needed for deeper analysis.
Note: If multiple tracks are selected, all the information (from multiple tracks) is combined in a single file. The #TrackName and header will allow to identify the beginning of all the tracks in the CSV file.
Importing Track
To import tracks, select the "Import/Export" button available under the button. Please refer to the Import & Export Data chapter for more information.
Note: When you import track from a file, they are added to your existing database.